Christmas Cookies

Friday, December 7, 2012

The cookie parade started innocently enough. Husband came home with a 'ready-made' tube of cookie dough with the usual groceries. He said that cookies sounded good. Well, they didn't quite measure up to homemade cookies.

So we began with the Best Chocolate Chip Cookies from Allrecipes.com. These are delicious, basic, 'like your mom makes' chocolate chip cookies.

But then I remembered the DOUBLE chocolate cookie recipe from Allrecipes.com which were absolutely amazing the last time I made them... so I had to make those too. The "Chocolate Chocolate Chip Cookies I" recipe is absolutely addictive. There is a reason I save this recipe for special occasions... they are kind of like your favorite Girl Scout cookies- somehow the box magically goes empty and you are accused of 'not being good at sharing.' The special tip to this recipe is to use 1/2 regular chocolate chips, 1/2 mini chocolate chips. This allows for your usual chocolate chunks in the cookie, but leaves melted chocolaty goodness where the mini chips reside.

Now, the original recipe of the double chocolate chip cookies makes approx. 48 cookies. The beauty of Allrecipes.com is that you can adjust the number of servings and it will adjust your ingredients. However, I looked at the '48 servings,' shrugged my shoulders and said, "Sounds good to me!"

So between the classic and double chocolate chip cookies... lets just say there were a lot of cookies here.


Now, I could have just stopped there and made gift bags with these cookies alone. But, Pinterest can be a dangerous thing. This year I have seen so many fun cookie and treat recipes for the holiday season, I figured that I could just KEEP GOING and make some fun cute cookies to add to the heap. 


So... adding to the above mentioned cookies, I also made:


Our kitchen was overflowing with Christmas goodies! Today we began the rounds of dropping off the holiday treats. Hopefully they will enjoy eating them as much as I enjoyed making them.

Have you made any great Christmas treats this season? Please share your favorite Christmas recipes below, I still have three weeks of holiday baking left!


More Dolls

Wednesday, December 5, 2012

I love the uniqueness of handmade dolls. For Little Tomato's first birthday, her gift from mom & dad was a handmade doll I bought on Etsy. I was not quite as adventurous with my sewing machine at that time.

Last year, I made a small doll for Little Tomato, which was my first attempt at making my own pattern. However, shortly after that project, husband and I were fully immersed in building our home and the sewing machine gathered some dust.

This November, I stumbled upon a new book, "Storybook Toys" by Jill Hamor, which looked like a great resource to learn how to make more complex dolls (my review of the book is here). Thus, this past month, I have been tinkering around with making doll patterns, and have made a couple as gifts for Little Tomato's pen pals. I still have one more to make (hopefully to be delivered by Christmas!), but I thought I'd share the first two which will be en route to their new homes soon!

The Blonde Ballerina:


 The ballerina has velvety soft alpaca yarn hair in a bun, a satin pink leotard, and satin ballet shoes. Her outfit is complete with a dusty pink tutu with a satin wrapped waistband and bow. I think I will make a different pattern for the leotard in the future, as I don't like how the arms attach to the leotard on this one.


 Banjo Bear Jumper:


The first yarn hair doll I made this month was Libby (see post here). Libby was pretty small for a doll, at about 10" tall. This made turning the limbs inside out very difficult and is just an awkward size- too big for a dollhouse, too small to be a huggable doll. After making Libby, I adjusted my pattern to make a larger doll. Since I loved the outfit, I made the new doll in the same banjo-bear jumper, but her features match the little girl who will have her.


I really enjoyed making this outfit in the larger size. It allowed for more detail in the banjo and the shoes. They are moccasins with 'fur' trim. :)


Thankful

Wednesday, December 5, 2012

Yesterday Little Tomato had her first surgery. It was a minor outpatient procedure, but I was still beyond relieved when she was brought back to the pre/post op room where I was anxiously waiting.

We had the procedure done at the children's hospital. I designed healthcare buildings for 7+ years and I have worked on more than one children's hospital. But it wasn't until yesterday that the gravity of it hit me... children's hospitals are full of really sick kids. As we were leaving, I saw a mother checking in with her child, who was obviously a cancer patient. It broke my heart to see this family and the struggle they are facing. We so often take our health for granted. We so often take the health of our children for granted. During this season of thanksgiving and reflection on the blessings in our lives, I am beyond grateful that my daughter is healthy. I am thankful that we were at the hospital for only a few short hours, and that it is not a regular setting in our lives.  I am thankful for the many wonderful people who make it their life's work to care for the sick. My heart is full of gratitude today. Full of gratitude for something I so often take for granted.

Favorite Christmas Books

Wednesday, November 21, 2012

I am a major advocate for reading. Even the smell of books is enough to put me in a happy place. 

This, coupled with my addiction to beautifully illustrated children's books, has amassed an impressive library of children's books. Today I am going to kick off the holiday season with my favorite Christmas reads. 
Image Credit: Amazon.com
The Christmas Miracle of Jonathan Toomey, by Susan Wojciechowski. This is my all-time favorite Christmas book. I have linked to the Amazon 1995 print. There is good reason for this. While the new books have a CD, they have done a hatchet-job of the breathtaking illustrations. It is a travesty, as the illustrations make the book extraordinary. You can see the difference against the newer copy here

A sad, reclusive woodcarver is visited by a widow and her son. They are new to the town, and she has realized that her family nativity set is gone. She asks the woodcarver to make her a new set before Christmas. He grumpily accepts the job, and is visited the following week by the widow and her son because the boy wants to watch him carve. As the woodcarver works, the boy teaches him about his nativity set- each figure and why it was special. Slowly, as each visit approaches, the woodcarver is softened by the kindness of the widow and the joy of the boy. The illustrations are warm and heartfelt and the story is lyrical and poignant.

Image Credit: ZiggityZoom
The Christmas Magic, by Lauren Thompson. I have to be honest here, I am a complete sucker for anything illustrated by Jon Muth. Not only are the illustrations frame-worthy, but the stories are almost always guaranteed to be spectacular. This is no exception. The story is a sweet and almost poetic narrative of Santa preparing for Christmas. This is not your 'holly, jolly Santa' story, but rather a more wise, kind, and old Santa whom you can imagine hand-carving toys of the past. 

Image Credit: Amazon.com
Great Joy, by Kate DiCamello.  This is a touching story of a little girl, Frances, who shows great compassion and love for others. I can't do justice to the simple, beautiful story by trying to explain it. Check it out. 

Some other great reads for the holiday season: 


Please add your favorites below! 

Hair Today, Gone Tomorrow

Wednesday, November 21, 2012

Last Friday, Little Tomato got in a wee-bit of trouble... she decided to give herself a haircut. In the time that it took for me to change clothes, she had lopped off some massive chunks of hair. She didn't just get the front, but had somehow managed to hack off some of the back too.

I didn't so much 'yell at her' as I began to squeak the words, "No, no, your beautiful hair!" in an eerily high-pitched voice.

Needless to say, the day did not go as planned and we spent the morning at the hairstylist taking a good 4-5 inches off the length (with lots of layers to hide the more 'dramatic' chunks of missing hair). I spent the afternoon vacuuming human hair off the floor that had somehow traversed half the rooms in the house.

So this morning, while we were working on a Thanksgiving craft, I opened the drawer to her desk to find what looked like a dead animal.


Oh, wait... no. Never mind. Just some evidence of last Friday's debacle.

Blessing Bags

Wednesday, November 14, 2012

Today my friend Sarah and I made 'blessing bags' together with our kids. We had both seen this idea on Pinterest [original link here] and wanted to do this as a November activity.


Sarah brought a book called, "The Tooth," by Avi Slodovnick which addresses giving to homeless and read it to the kids. We briefly talked about how some people do not have homes and the simple things we use every day like a toothbrush, chapstick, warm gloves, and food.We then gave each child five bags to fill with the various items and they enjoyed walking around the table filling the bags with blessings.


For anyone interested in doing this activity, there is a great 'how-to' on the link above, and I have included our list of items below.

A video of the reading of "The Tooth,"Avi Slodovnick can be found HERE at Storyline, read by Annette Bening.

We purchased gallon-size plastic bags and filled them with the following items:

  • Gloves
  • Toothbrush & toothpaste
  • Facial tissues
  • Reusable collapsible water bottle
  • Shampoo, lotion & soap
  • Chapstick
  • Cough drops
  • Band-aids
  • Deodorant
  • Granola bars
  • Cracker sandwiches
  • Applesauce
  • Gum

Meet Libby

Sunday, November 11, 2012

Yesterday I was planning on having my November 'craft day' with friends, however Little Tomato was feeling under the weather, so it was cancelled. However, Husband graciously watched her yesterday to allow me to still have the day to sew. I just purchased a new sewing book, Storybook Toys by Jill Hamor, and was eager to get to sewing with this book.

I ended up making my own pattern for both the doll and clothing, but I found the book really helpful regarding general information on face embroidery and yarn hair construction.

I have named her Libby, and intend to also make a handkerchief to tie in her hair for a little accessorizing. Libby was inspired by this adorable photo I saw on Pinterest.

Libby's shoes are removable so she can run with her bare feet. :)

Her hair is Nature's Choice Organic Cotton yarn, and is incredibly soft.

Her facial features are embroidered.
I couldn't resist adding the banjo playing bear to her smock. And the knee pads just added to the cuteness. 


MDC IdeaPaint Pro

Friday, November 9, 2012

I thought I would elaborate a bit on the MDC IdeaPaint Pro I used on the Learning Room wall. I had someone question whether it is worth the cost, as it is somewhat cost-prohibitive.
IdeaPaint Pro, a  2-part kit.


The MDC IdeaPaint that I used is the IdeaPaint Pro, which is as heavy-duty as you can get for dry erase paint; it is what they use in commercial applications where it is used regularly (ex. schools).  

The major plus of this stuff is that if applied properly it won't ghost like like cheap marker boards. The kit covers 50 sq/ft (which is the equivalent of a 5'-0" x 10'-0" dry-erase board). I covered this major swatch of wall and a 3'-0" x 4'-0" board with the extra paint. If you were to look at the pricing for a dry-erase board that size, this is a far cheaper option (especially for a durable, high-quality one).  


The cons
:
 
IdeaPaint Pro only comes in 50 sq/ft coverage, you can't get a smaller kit to minimize cost.

It has a strong odor when you apply it. If you have children, you will want to install this when they are not home in a *very well ventilated area* and give it a good 24 hours for the odor to dissipate. 

**If you purchase the IdeaPaint Create, this will have far less odor (it is considered a low-VOC product). "Create" is also available in a clear coat (to apply over an existing wall color). However if this is for use by children, it would be a wise decision to make it *crystal clear* which wall in your house is the only wall in your house to color with markers... or you may end up with some major touch-ups on your newly graffitied walls.

You *must* watch the installation video and follow it to a "T". It does not apply like standard paint. You need to keep a wet edge, apply thoroughly, and you cannot touch-up later. You also need to prep the wall prior to painting to avoid a bumpy writing surface. If you question your ability to apply it properly, you will want to hire a professional painter who has experience with epoxy paint (this applies similar to an epoxy). 

So to give you the SHORT answer, if you truly want the large-scale surface for dry-erase markers and want something durable, yes, it is worth the cost. If you do not want something this big, you may be better off buying a good quality large-scale marker board. 


Let the Marker Fun Commence

Tuesday, November 6, 2012


Some time ago I used MDC's IdeaPaint to make a large swatch of wall into a marker board. However, I did not advertise that this big white swatch of wall was 'writing ready' to Little Tomato because it would be far too easy to get 'overzealous' and run over the edges onto the *non-erasable* adjacent wall.


Yesterday we hung the new frame onto the marker board wall in the Learning Room. It is amazing what a difference the frame makes! The marker board paint went from an understated color accent to a BIG statement.

To make the frame, we purchased primed MDF crown molding trim and painted it. It took several coats, as the color is deep, and the primed MDF only comes in white primer (not a deep-base primer). Husband mitered the corners and screwed braces into the four corners. We nailed it to the wall, and voila!  I still need to do touch-ups, but it is at least ready for Little Tomato to wield markers.

October

Thursday, October 18, 2012

I wanted to share a few of the many things I have enjoyed this October...

Autumn walks at the new house...


...Vala's Pumpkin Patch, which has been a family tradition since I was a little girl...

Vala's Pumpkin Patch Pirate Band
{More Vala's photos on my old blog post HERE}

... reading Brene Brown's book, "The Gifts of Imperfection (great book, I highly recommend it)..."


... a "Craft Day" with friends that turned into an "Eat Fantastic Food and Visit Day" and a wonderful birthday weekend with my husband and friends. 

What have you enjoyed this October?


You've Got Mail

Tuesday, October 2, 2012

This last month I worked with Little Tomato on writing letters to pen pals; two cousins who she sees once or twice a year, and a 'friend' whom she has never met. Though she is just in the beginning stages of writing and reading, it is a great experience to keep up with playmates/ family she sees so infrequently, and to 'meet' someone new and learn all about each other through writing.

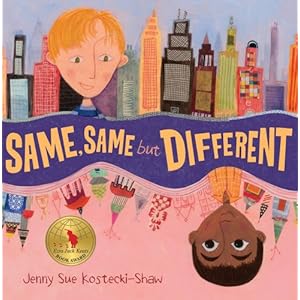
Same, Same but Different, by Jenny Sue Kostecki-Shaw
There is a great book called "Same, Same, but Different" written by Jenny Sue Kostecki-Shaw which tells the story about pen pals, one from a big city in the USA and the other from India. They describe their families, pets, homes, etc. to each other through their letters. An example of their correspondence is when the boy from the United States writes about busy streets where he lives, with illustrations of traffic-crowded streets. The boy from India responds by noting that they don't have many cars, but he still has busy streets and his illustrations show streets full of carts, cars, elephants and pedestrians. Same, same but different.

We read this book and talked about how our new pen pals live in different parts of our country and how we would learn about our friends and family from the letters she will write and receive. It is a great book to introduce diversity, geography and starting a pen pal with someone new. I highly recommend it.

Halloween Mantle

Friday, September 21, 2012

I have always loved Fall, with its brisk temperatures, the vibrant, bold colors and everything pumpkin... My birthday is also in October, so Halloween-themed parties were always a part of growing up.  

One thing I was looking forward to when moving into this new house was the fireplace. It is beautiful, it will be able to function when the power goes out (BIG bonus in the country...) and I finally have a mantle to decorate! There is something so elemental about a hearth. It used to be a central feature of the home, where you cooked, gathered for warmth and conversation... it was truly the heart of a home.  I am enjoying decorating my hearth, and I look forward to when the cold weather allows to light the fire and enjoy hot cocoa and board games with the family by its warmth. {Though I can wait- Fall, don't pass by too quickly!}


Dinosaur Dig

Monday, September 10, 2012

My nephew is really into dinosaurs right now. His knowledge of dinosaur facts has me pretty astounded, considering he just turned four today.

For his birthday I wanted to give him something special, so I made him a dinosaur fossil dig:

Dinosaur Fossil Dig

Supplies:
Plastic Container - parents greatly appreciate a lidded container...
Dinosaur Fossils
Play Sand
Brush

For fossils, I found these at a local party supplies store, though they may be found on Amazon HERE.

I purchased a storage tub, a bag of playground sand and an inexpensive art brush to complete the set.

I would recommend filling only a third of the tub with sand, which makes it easier to find the fossils and doesn't weigh the tub down.

Dinosaur Dig Gift
A simple, fun gift for the dinosaur lover.

The Many Lives of a Drop Cloth : Floor Cushion Tutorial

Saturday, August 25, 2012

A couple of weeks ago I bought a 9'-0" x 12'-0" drop cloth. I had the idea of using the fabric as a canvas for several projects. (Get it, canvas fabric as a canvas? I love puns.)

The first project that came to mind was a floor cushion for a reading area in the learning room.

I love THIS RH floor cushion, but not the price tag...

My final floor cushion made from drop cloth fabric:
Drop cloth floor cushion.

Process:

Materials:
Drop cloth
Thread
Fabric Marker (or if you are like me, grab the nearest Sharpie marker)
Contrast fabric, if desired, for the straps
Stuffing

* I used 1/2" seam allowances.

Fabric Cuts:
Qty. (2) - 25" x 25" squares for the top and bottom.
Qty. (4) - 7" x 26" strips for the edges.
Qty. (8)- 2" x 8" strips for the corner straps, (4) strips for color "A" and (4) strips of color "B."

* If you did not want the front and back of the corner straps to contrast, instead of Qty. (8)- 2" x 8" strips,  use Qty. (4)- 4" x 8" strips for the corner straps.

On the (4) edge pieces, I drew a solid line 2" from the top and 2" from the bottom. These were the top and bottom lines for the alphabet. I then drew a dotted line in the center. I used a ruler to make the lines straight, and to make the dotted line 1/2" long with 1/2" spacing.

I then drew the alphabet on each edge:
Side 1: "a" through "g"
Side 2: "h" through "m"
Side 3: "n" through "t"
Side 4: "u" through "z"

Four edge pieces with letters drawn onto them.
I eyeballed the spacing between the letters and then slowly drew each freehand, adding directional arrows to each letter. I'm sure if you have a Silhouette or a CriCut machine, or used iron-on paper, it would also be effective.

To make the straps, I sewed together two contrasting fabrics, right sides facing, and turned inside out.

If you are not using contrasting fabric, use this method to make the 1" wide straps.

Four edges sewn together, with straps sewn onto the edges.

I then sewed the four edges together (right sides facing), and basted the straps on the right side of the corner seams.

Finally, with right sides facing, I sewed on the top and bottom pieces, leaving a small opening to turn the cushion right side out, stuffed the cushion with stuffing, and hand-sewed the opening closed.

Voila!

This project used about 1/6 of the $22 drop cloth. The rest will be used for upcoming projects.

Unfortunately, I did not take step-by-step photos, but if you have any questions, feel free to post in the comments!

I have also included several great tutorials for varying floor cushion patterns below:

Fiskars Tutorial: This is a more structured cushion (foam insert vs. stuffing).

"Fold, Stitch & Stuff Floor Cushions" via Apartment Therapy

This "Tried and True"cushion from Gerbera Design is round, but oh-so-cute and must be included.


Learning Room, Phase 2: Tulle Pom Poms

Wednesday, August 22, 2012

Husband and I are making our main floor 'den' into a Learning Room. This space is intended to encourage learning by emphasizing reading, writing, science, art, etc. Examples of such spaces can be found here

I am a fan of using color in accents. I love a neutral canvas with pops of color. In that spirit, I added color to the learning room by making several tulle pom poms as a ceiling accent. This both adds color to the room, and lowers the scale of the ceiling, making the room feel more intimate. 


To make tulle pom poms, here are a couple of tutorials:


A couple of tips to expand on the tutorials: 

Be SURE your ribbon or wire is between the two pieces of cardboard!! 
See that big purple ball? It is about 24" in diameter and took a loooong time to wrap as it was several spools of tulle. The ribbon (which is what I used to secure the center) apparently snuck out of the cardboard sandwich, so when I pulled apart the two cardboard templates, the perfectly cut tulle just fell onto the floor in a big mess. After silently screaming and gnashing my teeth, I spent the next 10-15 minutes salvaging the pieces. The top of it looks a little wonky, but luckily you don't see that part. {Wink.}

If you are doing a large tulle pom pom (like these), I recommend making a slit in the cardboard, rather than the full donut, similar to this yarn pom pom template. The larger the ball, the more tulle it will require for your desired fullness... essentially, your center 'donut hole' will get smaller and smaller as you wrap with more tulle, making it harder to feed through the center. The slit will allow you to feed it through much easier.

And finally, a room view with the table, chair, and pom poms:


And because I know some of you are wondering why that chalkboard is mounted so high (bestie, I'm looking at you!), the answer is two-fold...

1) The chalkboard is not for Little Tomato's use. I didn't want chalk tracked through the house, so I have an alternative to a chalkboard for her (Phase 3 of the Learning Room).

2) Imagine a piece of furniture sitting under it. (Phase 4, the largest undertaking...)

And in case you were wondering what it says right now, it is my favorite Shel Silverstein poem:

Listen to the MUSTN'TS, child,
Listen to the DON'TS
Listen to the SHOULDN'TS 
The IMPOSSIBLES, the WON'TS
Listen to the NEVER HAVES, 
Then listen close to me-
Anything can happen, child,
ANYTHING can be.

Learning Room, Phase 1: Desk & Chair

Tuesday, August 21, 2012

Our new home has a small, open room on the main floor. While this type of room is typically utilized as an office or reading den, we have decided to make this a room for Little Tomato.

This space is intended to encourage learning by emphasizing reading, writing, science, art, etc. Examples of such spaces can be found here

Part 1: Desk
Husband and I purchased a floor model desk at a children's store some time ago. I spruced it up by painting it the same color as the kitchen table with our leftover paint. As this had drawers, I removed the drawers from the table and the knobs from the drawers to paint it. I also removed the legs to fully cover the joint between the top and legs, as this is a visible joint. 

Part 2: Chair
The chair, post-sanding and pre-staining.
I found a wood children's chair at a thrift store for $15. The stain was worn and uneven, and did not match our house, so it was in need of a good sanding and re-staining. I wanted an aged grey stain for this, as our kitchen and dining room chairs are this color. 

Using this tutorial, I combined apple cider vinegar, coffee grounds, and steel wool in a bowl and let it sit for a few hours. I then used the steel wool as a 'sponge' to apply it to the chair. The stain needed a couple of hours of drying time to see the aging effect. At first it only appeared wet, and did not seem to change the appearance. I was impatient. {Shocking, I know.}

Note: On my first attempt at this stain I used stainless steel pads. This did not produce a good stain. I would highly recommend 0000 steel wool or similar to get desired results.

Final products:


I also changed out the plain wood drawer knobs of the table with some decorative iron knobs from Hobby Lobby. I highly recommend checking out their knob & pull section for your knob needs. Several knobs look strikingly similar to the Anthropologie pricey knob selection. As these were 1/2 off when I purchased them, I got them at a whopping total of $3.


Kitchen Nook, Phase 1: Kitchen Table

Sunday, August 19, 2012

I am in the process of making our new house a home. Room by room I am completing projects... and creating new ones along the way. The list is overwhelming, but I am a seasoned veteran in the field of ridiculous project lists. 

My current project: The Kitchen Nook. 

We have a nook in the kitchen with a loooong built-in bench. It has been an awkward empty space for the past few months. The bench is in dire need of cushions to protect the white paint from the inevitable scratches that occur from daily use (read: small child), and our table is so unsightly that it has been hidden under a tablecloth.

Husband has also remarked on more than one occasion that "the house of white could use some color." So, I felt it was about time to do something to get the ball rolling...

Part 1: Make the table presentable.


This was my table in college. It was already a paint-stained, water-stained, worn mess when I acquired it (notice the large stains on the non-primed side) and the center leaf was non-existent. It was gathering dust in my mother's basement until I asked to take it home and revive it for our kitchen.

I decided to paint it a light 'robin's egg blue/green' color to add a little color to the kitchen. 

For those looking to paint furniture here are a couple of great links for tutorials:


This table took three coats of primer, especially to thoroughly coat those spindle legs. Using the sage advice of the above links, I sanded after each coat of primer and each coat of paint. The end result was far better than past attempts when I just threw on a coat of primer and paint. As this is a kitchen table, I plan on adding a layer of polyurethane on the table top to prevent wear of the paint layer. 


Here is the finished table. The color is Sherwin Williams #SW 0059 "Frostwork."

Project 2: Sew covers for the pillow inserts...

To be continued!

My New Neighbor, Mr. Frog

Wednesday, August 15, 2012

The family and I recently built a farmhouse. On a farm.

It is bit of a change from suburban living.


[Enter the frog]


In this record-breaking heat, I have been spending an exorbitant amount of time watering plants. The other day, I went to turn off the spigot when I saw movement and quickly pulled my hand back. This little guy greeted me there and I thought, "Well this is new."

He let me turn off the water and even stayed long enough for me to come back out with the camera for a little photo session. I found him to be a charming fellow.

Fast-forward to a couple of weeks later. 

I woke up, walked into the bathroom to use the restroom (mind you, this is on the second floor) and a new frog decided to introduce himself...  by jumping at my rear-end from the inside of the toilet bowl. He then escaped out of the toilet and began manically jumping around the floor. 

I, understandably, ran screaming. 

A few minutes later, after the hyperventilation stopped, I took a hand-towel, coaxed him into the towel, and released him into the flower bed. 

I am now that paranoid woman who inspects toilets thoroughly before use.

And I don't find Mr. Frog quite so charming anymore.

Proudly designed by | MLEKOSHI PLAYGROUND |