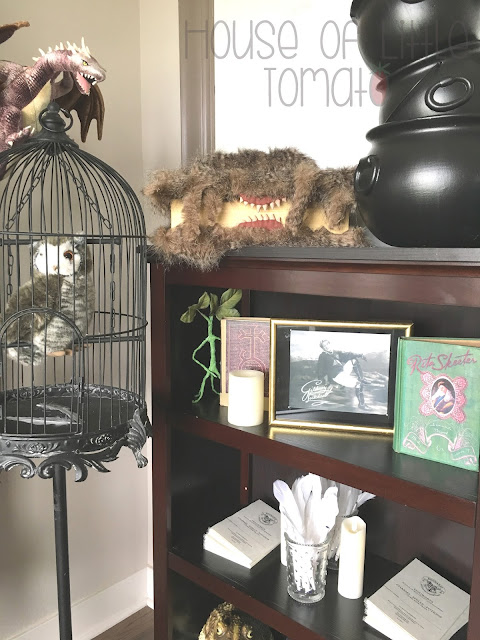
Harry Potter hit our house
big time this past year. Little Tomato finished "Harry Potter and the Sorcerer's Stone" in August of 2016 and immediately proclaimed that she wanted her next birthday to be a Harry Potter party.
Decision made in August... birthday in
June.
Over the next few months, she DEVOURED all 7 books. She commandeered Dad's old CD player to listen to the audiobooks (
Jim Dale, you're amazing), and still listens to them almost daily.
As we read the books, we did Harry crafts. We made wands together as a family, practiced sewing by making house scarves, made 'potion' slime, decoupaged potion labels onto bottles, molded creatures out of clay, and sponge-painted a brick wall.
Her excitement for a Harry Potter birthday did not waver, and there was no shortage of content for me to start planning my most ambitious [read: crazy] party to-date. 10 months is a lot of time to go overboard, and I'm already prone to going overboard.
We decided that her party would only be 'first year' for a couple of reasons. Though many of her classmates had also 'caught the Potter bug', many of them have not yet gotten past the first book or two. There are also SO MANY excellent details written by the fabulous J.K. Rowling, that it was easier to focus the projects and party activities along the storyline of one book.
My blogging has been stagnant for the past several years, so I have not written any posts on the projects you see in the pictures below. I'll try to follow up my party posts with individual project posts, but you're welcome to leave inquiries below on any specific parts. 😊
A huge benefit of planning a party like this months in advance is that you can take your time acquiring materials. This is a
significant cost savings. I have included some ideas below, if you are interested in planning a HP event of your own:
Holiday clearance bounty.
Though we already had some Halloween decorations that could be used for the party, we made a wish-list of items that we wanted to add (mini-cauldrons for the potions experiment, witch hat, broomstick, etc.). We hit the clearance aisles after Halloween and were able to find great deals; 6 packs of mini cauldrons for a quarter, witch hats for a dollar, a giant toad for two dollars, etc.
As we got closer to the party date, we found jelly beans and candy on clearance after the Easter holiday. Printable labels and plastic baggies made these inexpensive realistic-looking Honeydukes treats.
Ask friends to keep an eye out for supplies.
Many of the supplies you'll want are free if you ask around. We received boxes of empty perfume & bubble bath bottles, empty unique wine & liquor bottles, old books, and picture frames. We found free potion labels and graphics that we were able to print at home and turn these into the magical Diagon Alley wizarding supplies.
Know if your local party supplies stores have any special events.
One of our local party supplies stores has an annual "Bag Sale" where you can fill a bag FULL of
any clearance items for $10- and there is no limit to the number of bags you fill! I was able to score the LED flickering flame candles, LED color-changing plastic ice cubes and the colored melting wax candles from this event for a
serious steal.
Invitations
The party invitation was an acceptance letter to Hogwarts which included a ticket to Platform 9-3/4. I was able to find the Hogwarts crest, Minerva McGonagall signature, and misc. owl stamp files online, and designed the invite & envelope in Photoshop. I printed the invites at home on parchment paper, and printed the owl graphics onto the kraft paper envelopes at home as well.
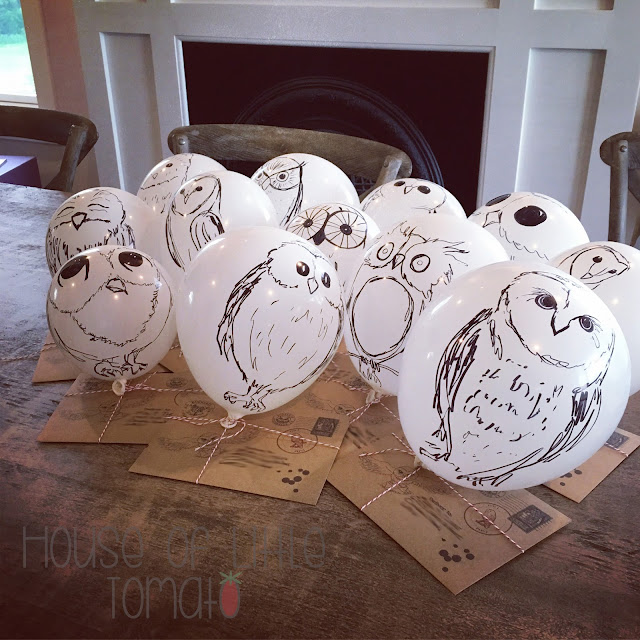
We hand-delivered the invites to the girls via 'owl post'. I blew up a few white balloons and drew owls on them for delivery. The image below is the collection of owls ready to deliver their packages.
Approaching the House
Approaching the house, we had an outdoor signpost with an owl perched atop, and a 'school trunk' near the front door.
The signs were wood boards I cut into arrows, painted, and mounted to a pole. The owl is a decoy/ scarecrow.
To be perfectly honest, I filled the trunk with dark laundry to make it look full, draped a robe over the edge, and piled some old ratty books on top of the laundry - topping it with "Quidditch Through the Ages" & "Fantastic Beasts & Where to Find Them" to make it look like a trunk full of wizard clothes and school books.
So... signage.
I built theater sets in high school. One thing I learned from that experience: insulation foam is amazing. It is lightweight, easy to cut (boxcutter or foam-cutting tool), and inexpensive. A 4' x 8' sheet will cost around $12 -$25 depending on where you buy it and the thickness of the foam.
For the party signage, I bought a total of (2) sheets of foam and made every single indoor sign AND the Bertie Botts display out of the two sheets of foam, a single quart of primer and misc paint colors.
The Platform 9-3/4 and Leaky Cauldron signs are made of insulation foam.
I had purchased three canvas drop cloths and converted them into curtains hung on tension rods to close off the 'Great Hall' from view, and to make the brick wall onto Platform 9-3/4.
For the brick wall, I also purchased one of those magnetic mesh screen doors (not
THIS one, but a similar one on clearance at our local hardware store for $8...) and sewed it into the center opening. I loved the idea of the brick wall closing back up behind the students as the walked through it, and luckily it worked as planned.
It was an awesome effect.
 |
| 'Hogwarts student' walking through the brick wall. |
 |
| Brick wall closes back up behind students via magnetic closure. |
Next up, Part 2: Diagon Alley...
SaveSave


